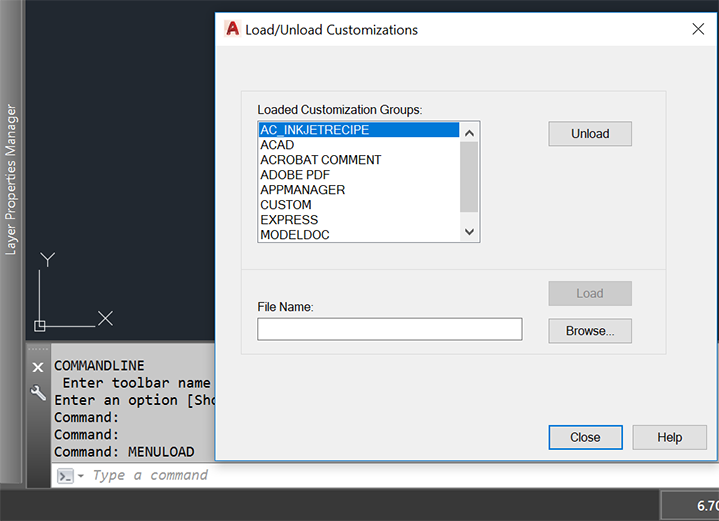

The Randgen program is normally launched from a drop down menu. However our installer does not have the ability to automatically install this menu into AutoCAD. Therefore the user must do it manually.

After the installation is complete, you won't see any evidence that Randgen has been installed in the drop down menu. You need to direct AutoCAD to load the appropriate menu file at startup which will in turn load the required .vlx files.
MENULOAD
Use the MENULOAD command to open the dialog that controls the loading and unloading of customizations

Find the Custom Menu for Randgen
Using the Browse ... button (see screenshot above), navigate to the directory where Randgen is installed. By default this is C:\ACS Pacakge Tools\2017\Randgen unless you directed the installer to use a different directory.

Select the Custom Menu File
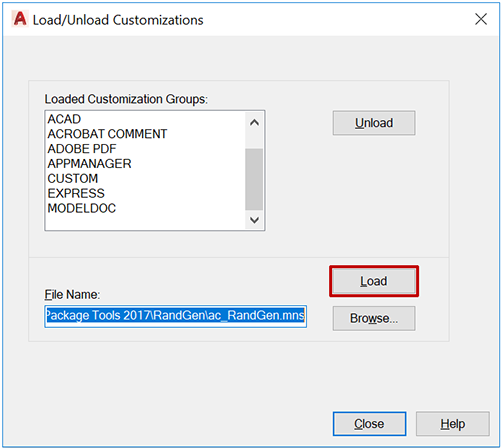
Now select the custom menu file - ac_Randgen.mns

Loading the Customization
Once you have selected ac_Randgen.mns you must now load it into AutoCAD's Customization group using the Load button.

The Randgen menu item should now appear in AutoCAD's main menu bar.

Security Note
AutoCAD will likely pop up a warning when you first install Randgen - something to the effect that the loaded program is not "signed." You should choose to always Load. This generally happens twice (once for each executable). Once you have made this choice you should not see the warning again.