November 9, 2022
Steve DiBartolomeo
Applications Manager
In a production environment, WMBatch's repeat directory loop makes converting incoming wafer maps very fast and efficient.
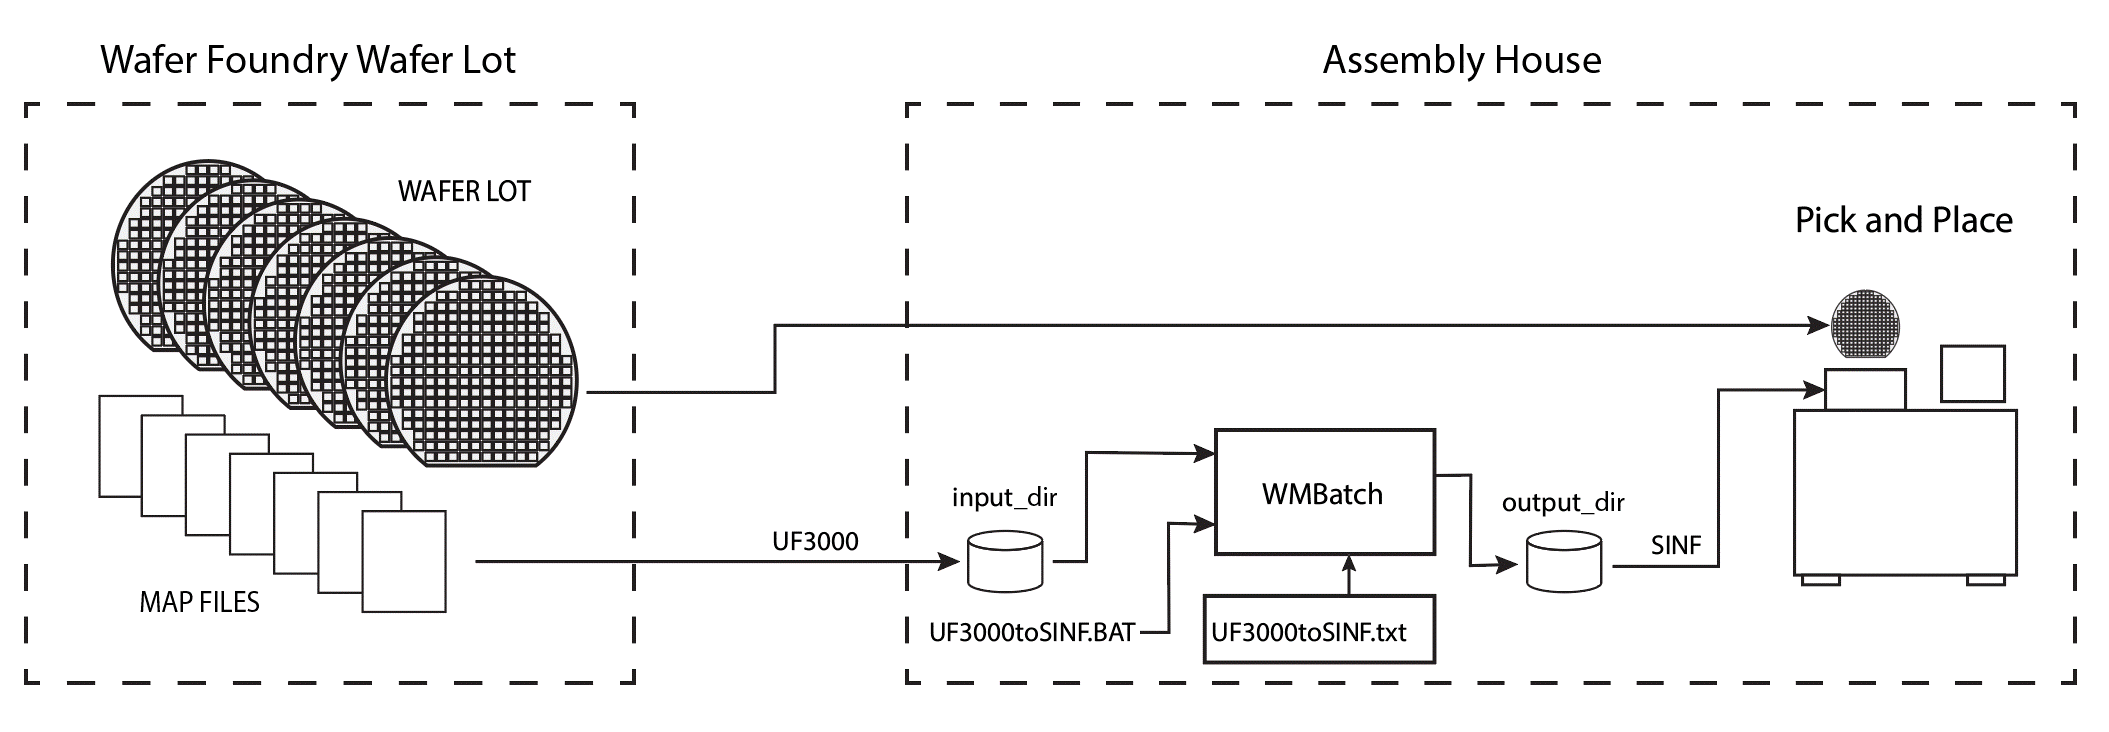
Imagine that you work in a chip assembly operation and you have a wafer foundry client that routinely sends you wafer lots along with map files for the wafers in the lot. In this situation the following assumptions are usually true:
a) the number of wafers in a given lot can vary -- some lots may have up to 25 wafers while others will have less.
b) the wafer map format supplied by the foundry is always the same - in this example UF-3000 binary .DAT files.
c) your job is to accept these map files and convert them into a map format that your pick and place machine can read. In this example we want to produce a SINF file in Hexadecimal format.
To add some specifics to our hypothetical situation, lets say that:
a) the foundry name is Excalibre
b) the incoming map format is UF3000 (binary)
c) the map file format needed for the pick and place machine is SINF
Therefore the assembly house is going to need to convert each map file from UF3000 into SINF format in order to process the wafer.


Excalibre - the directory assigned to the foundry called Excalibre
input - the directory where we will place all of the UF3000 files from a given lot
output - the directory where the converted EM files will be produced for our pick-and-place machine
DAT2SINF.bat - the DOS batch file which will launch WMBatch.
DAT2SINF.txt - the command file which will control the conversion.
The DAT2SINF.bat Dos Batch File
This is a simple DOS batch file (.bat) that saves us from typing a long command line every time we want to run WMBatch. There are only three arguments:
C:\wcad\wmbatch\WMBatch64.exe
full path to WMBatch program
-command_file:D:\Excalibre\DAT2SINF.txt
tells WMBatch to use this command file
-log_file:D:\Excalibre\DAT2SINF.log
tells WMBatch to write the log file here
The DAT2SINF.txt Command File
Here is where we the repeat directive to process all of the files located in the Map in directory.
Always start your command file by defining your input_dir and output_dir
input_dir "D:\Excalibre\input"
output_dir "D:\Excalibre\output"
Now use the "repeat for files in" directive referencing the directory we want to get the map files from.
repeat start files in <input_dir>
The WMBatch program will cycle through all the files it finds in the directory, processing each one; then looping back to process the next file.
[Note] It is important to only put the correct map files in the <input_dir> directory. Otherwise WMBatch will try to open a file that it is not expecting and may stop or lock up on the unknown file. If you do need to put files that are not for conversion, you can also use a different file selection syntax to get only .DAT files as shown below:
repeat start <FILE>.DAT in <input_dir>
Now Use the "open" directive to open a file and tell WMBatch that the format of this file is UF3000.
open <FILE.EXT> format UF3000
WMBatch parses the file and loads the data into its input buffer. It also makes a second copy and places it in the output buffer. The input buffer is read-only; the output buffer can be modified with further directives.
Next, use the "convert" directive telling WMBatch to convert the contents of the input buffer into the SINF format and place it in the output buffer. Because there are two types of SINF files (DECIMAL-3 and HEXADECIMAL-2) you must specify which type you want created.
convert format SINF HEXADECIMAL-2
Bin Code Mapping
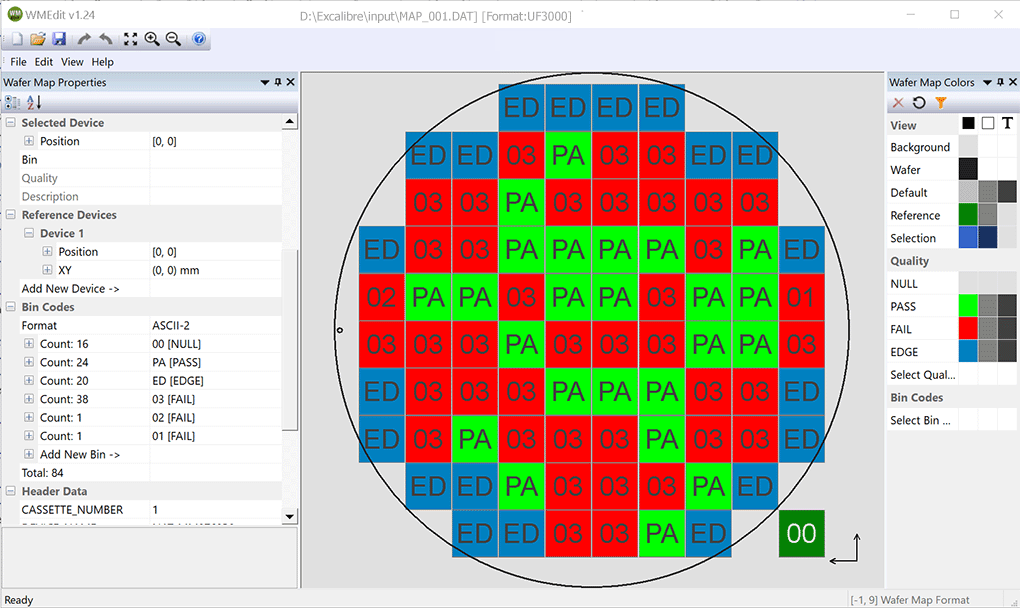
We could just save the results now. However we would not necessarily get the desired bin codes in our SINF file. The pick and place machine is expecting the following bin codes in the SINF. So if we inspect one of our incoming UF3000 files to see what the bin codes are we see the following:

So these are not all going to translate into Hexadecimal values (at least not in the way we expect) so we are going to want to set up bin mapping so we can control the bin mapping from the UF3000 bin labels into SINF bin labels.
What we Want for SINF Bin Codes
Our machine expects in the SINF map file:
PASS devices to have bin code 01
All FAIL devices to have bin code 0F
NULL devices and Edge devices to have bin code __
To achieve this we will use the following bin mapping section.
# Bin mapping SINF: PASS=01, FAIL=0F, All others = __ (i.e. NULL)
bin map ED 00

bin map 01 0F

bin map 02 0F

bin map 03 0F

bin map PA 01
Comments
Bin mapping can be tricky when you are going from incompatible formats which we are in this case. Notice that though the UF-3000 has a bin map for EDGE die, in the SINF file we want those to look just like NULL die i.e. __.
We don't have to map 00 to __ because 00 is already the default for NULL and will be automatically mapped by the program.
Also notice that we already have a bin called 01 which is a FAIL die. We need to map that to 0F in the SINF. So we need to be careful to do that before we then set PA to 01. So that's why we have as our last bin map PA 01
Use the "save" directive to save your map file. You can modify the extension (i.e. from .map to .xml) if you wish, since the map file name is stored as two components: <FILE>.<EXT>. For our extension we want .SINF so we know the file is in SINF format.
save <FILE>.SINF
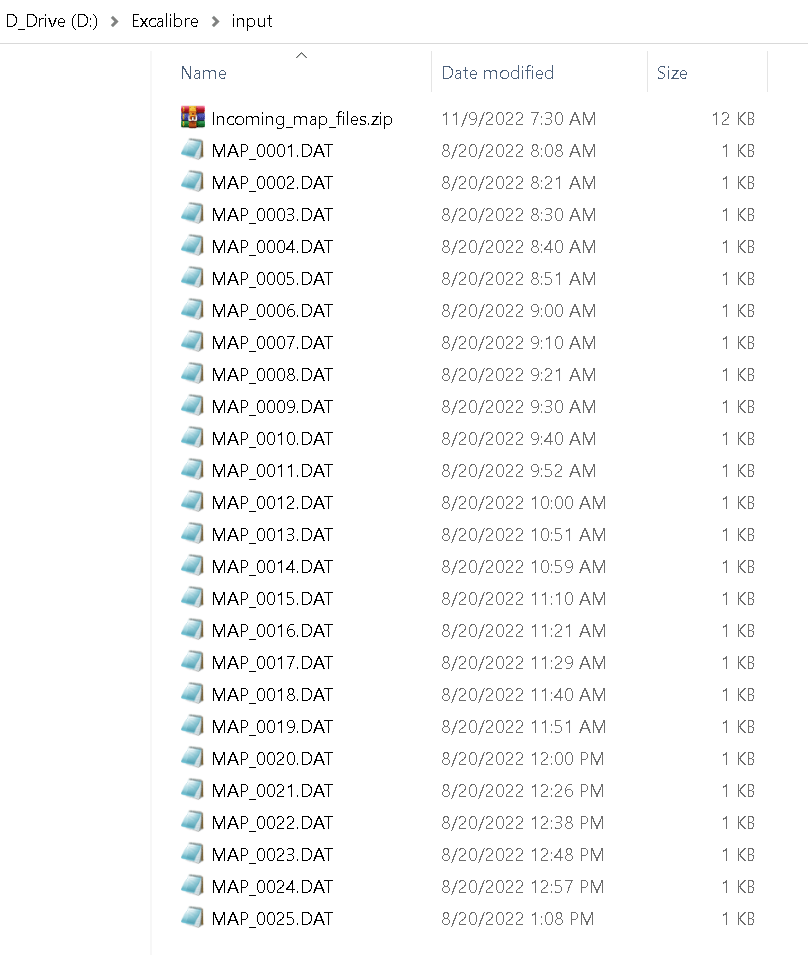
First, we copy our 25 .DAT files into the input directory as shown below:

Now, from the D:\Excalibre directory we double click on our batch file: DAT2SINF.bat. It will execute WMBatch, convert the incoming files per the command file and write them to the output directory.

If we now examine the output directory we will find that there are 25 SINF files.

Below is the output file MAP_0001.SINF
WAFER:2007017CUA1
LOT:2007017CUA
ROWCT:10
COLCT:10
FNLOC:270
DUTMS:MM
XDIES:18.42682 MM
YDIES:18.6808 MM
REFPX:10
REFPY:10
BCEQU:01
RowData:__ __ __ __ __ __ __ __ __ __
RowData:__ __ __ 0F 01 0F 0F __ __ __
RowData:__ 0F 0F 01 0F 0F 0F 0F 0F __
RowData:__ 0F 0F 01 01 01 01 0F 01 __
RowData:0F 01 01 0F 01 01 0F 01 01 0F
RowData:0F 0F 0F 01 0F 0F 0F 01 01 0F
RowData:__ 0F 0F 0F 01 01 01 0F 0F __
RowData:__ 0F 01 0F 0F 0F 01 0F 0F __
RowData:__ __ __ 01 0F 0F 0F 01 __ __
RowData:__ __ __ __ 0F 0F 01 __ __ __
And here is what it looks like in WMEdit.
