Network Printing Problem from Windows 95
Symptom
When printing from ACS software under Windows 95, you see the error message:
Error occurred in starting to print document (87).This error message pops up after the plotting progress dialog box shows
Plotting Completed: 100%and then disappears. Other programs may print correctly to the same printer. This error message appears only when printing from Artwork’s plotting modules such as GBRVU/W, GDSVU/W and GSDPLOT/W.
Reason
This occurs only with network printers, and only when the network printer path is not associated to a LPT port. The default behavior when adding a network printer is not to associate a port with the network printer path. Artwork's printer driver requires such an association in order to detect the network printer. This behavior occurs only in Windows 95 - not in Windows 3.1 or Windows NT.
Solution
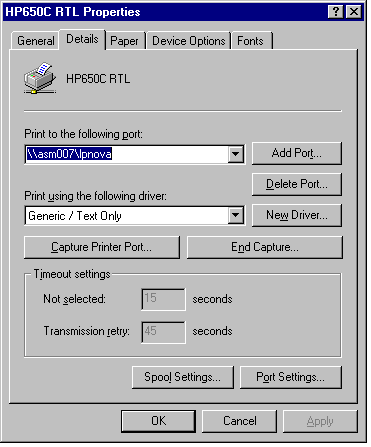
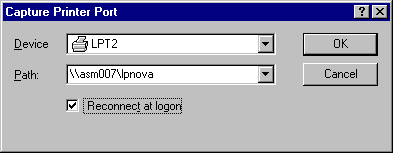
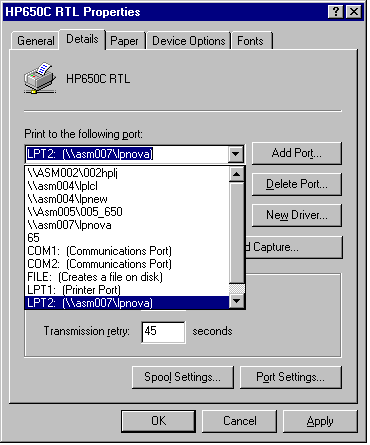
Associate a port with a network printer path. In the example shown below we have a network plotter called HP 650C (which we set up using the Windows generic/text printer since the Artwork plot driver creates the correct file format for the 650C). The printer is attached to a workstation called asm007 and is assigned on that workstation the name lpnova. Windows 95 therefore shows the port for this plotter as \\asm007\lpnova. However when you attempt to plot from Artwork's application, an error message appears. We will go through the steps required to associate this network printer with the port lpt2:. Don't worry that your computer does not have a physical lpt2:.
Step 1
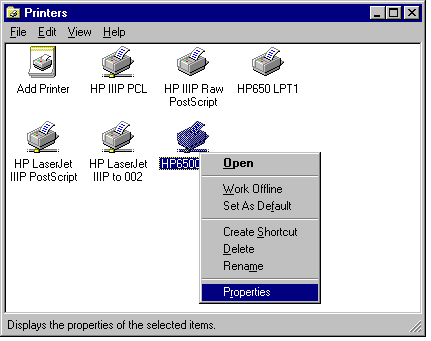
Get to the Printers dialog box by clicking on Start. -> Settings -> Printers.


