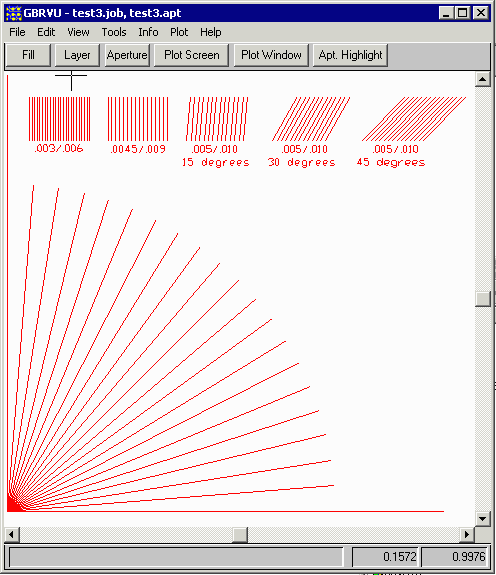
We will illustrate super-sampling/grayscale using a small test file called test3.gbr which you can see in the screen shot below. The file is 1 x 1 inch in size (to minimize our compute times) and has narrow lines (3.0, 4.5 and 5.0 mils) with narrow gaps.

Figure 7: test3.gbr contains narrow lines (3,4.5 and 5 mils)
Our imaging machine runs at 750 DPI but its laser power per pixel can be modulated to to vary the area imaged on the photo-resist. Therefore we would like to super sample by a factor of 8 and get a gray scale TIFF output.
Output DPI = 750
Sample DPI = 6000
Output Format = TIFF
Input File = test3.gbr
Input Format = RS274X
We have installed our gbr_rip programs in a directory called c:\wcad\gbr_rip. We will be using the gbr2tiff64.exe executable to generate the files. The command line with comments is shown below. Note that the command line has no breaks (or comments) in it -- they are shown there for clarity.
c:\wcad\gbr_rip\gbr2tiff64.exe      the executable (this calls gbr_rip)

 test3.gbr                        the input file to process

  -274x                           input is RS274X format

  -inch                           input is in units of inches

  -aw                             calculate extents window automatically from input data

  -status                         display a status dialog

  -dpi:6000                       set dpi = 6000
                                  this is the super sampled dpi calculate this value from your
                                  desired output dpi x oversample ratio (i.e. 750x8=6000)

  -tiff:test3_gray.tif            output is tiff
                                  output file is test3_gray.tif

  -super:8                        use supersampling at 8X

  -ram:32                         allocate 32 MByte for raster buffers
We used the test3.gbr file to create several different outputs
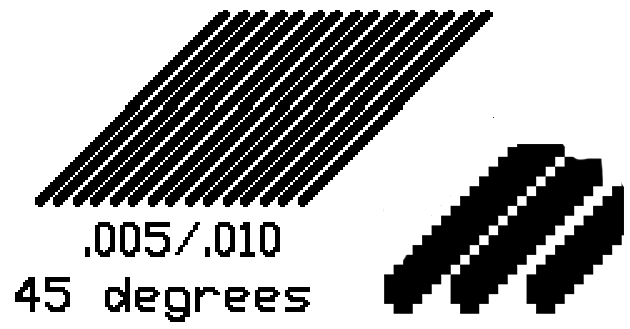
Monochrome 750 DPIOutput is monochrome at 750 DPI. No supersampling.
gbr2tiff64.exe test3.gbr -274x -aw -dpi:750 -tiff:test3_750.tif -ram:32

We zoomed in on the upper right corner of the image until the jaggies are clearly visible. One can see that the 0.005 inch lines at 45 degrees don't rasterize very well at 750 DPI (the pixel size =0.0013 inch.) Note the "steps" one finds due to the accumulation of error on the bitmap grid.
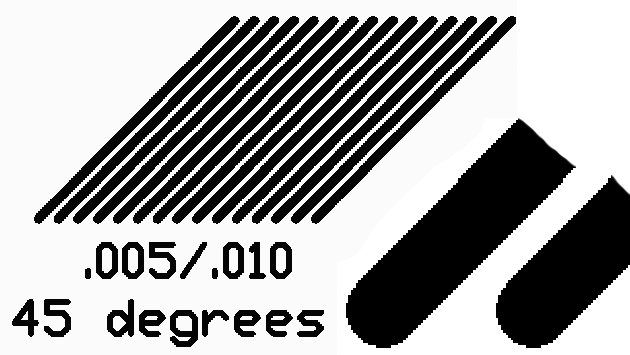
Output is monochrome at 6000 DPI. No supersampling.
gbr2tiff64.exe test3.gbr -274x -aw -dpi:6000 -tiff:test3_6000.tif -ram:32

This looks much much better because of course we are now using a 0.000167 pixel to image 0.005 lines. In fact, this screen shot cannot capture how much smoother the results are at 6000 dpi because now it is the screen shot introducing jaggies. However it is not helpful if our hardware cannot run at 6000 dpi.
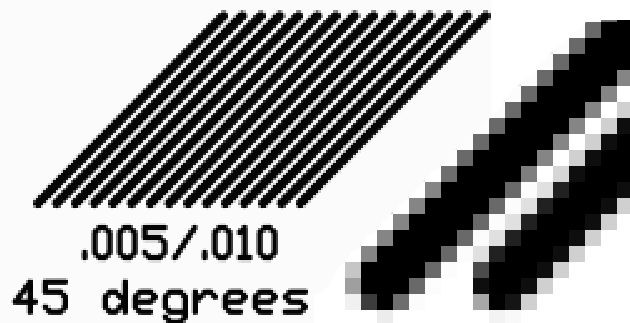
Output is gray scale at 750 DPI. Data is supersampled 8X = 6000 DPI.
gbr2tiff64.exe test3.gbr -274x -aw -dpi:6000 -tiff:test3_gray.tif -super:8 -ram:32

This looks better than the 750 mono but not as good as the 6000 mono (hey, there is no free lunch in life ...)
Not all of the GBRTIFF options can work together at the same time with super sampling.
only -tiff and -bmp outputs can be used with super sampling.
-super8 or -super16 option must follow the -tiff or -bmp option
-pack (for packbits compression) can't be used with -super.
gray scale output is not compressed.
The -super:16 actually has 257 states: the 256 pixel positions in the 16x16 pixel array in addition to the 0 pixel state. The 255 and 256 pixel states both yield 255 in the output data. 8x super sampling results only 65 states with values between 0 and 255.