tier_title.gif

What is a Tier?

When bonding a BGA the wires are grouped into tiers. Each group of wires that share the same approximate length and start/end locations can be bonded using a common loop height.

For example, wires bonded to the ground ring are typically about 1500-2000 um long and use a low loop height. Wires going to the bond fingers may be 3000-4500 um long and use a higher loop height.

tier_ex.gif

When programming an automatic wire bonder it is necessary to program in sets of tiers i.e. all wires with a common tier/loop height are bonded in one pass; then the next group of wires is bonded and so on....So it is extremely useful farther down the manufacturing cycle if the bondwire drawing has the bond wires segregated by tiers.

The Problem?

The problem is that the BGA design tools do not segregate the wires by tier. You will generally get all of the wires on a single layer.

The Solution?

Bondgen's OLP Wires routine solves the problem in seconds. The user starts the routine, specifies the wire layer(s), and tells the routine to scan the wires.

Using a sophisticated sorting routine, OLP Wire determines which wires are grouped into a common tier. It then enables the user to define a layer and layer color for each tier. Finally it moves the wires to the appropriate layer.


Example

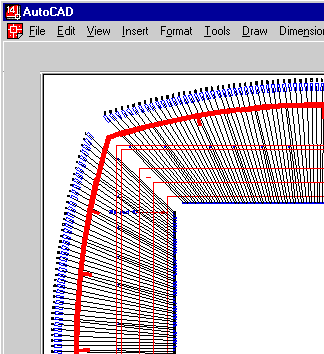
In the example shown at right have used Bondgen to create a bond wire drawing using data extracted from a BGA design done in Xynetix Encore BGA. You can see the from AutoCAD snapshot that all the wires are grouped on a layer called WIRE.

We would like that all wires attached to the ground ring are grouped on a single layer, all wires attached to the power ring are grouped together and all wires to the bondfingers are grouped into a third layer. Each layer will be assigned its own color so that we can easily see what is going on.

tier1a.gif


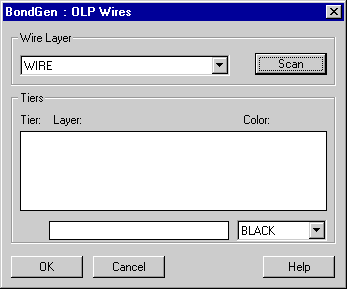
To sort the wires by tier open the OLP Wires dialog box as shown at right. Select the AutoCAD layer that holds the wires. Then press the Scan button.

tier2.gif


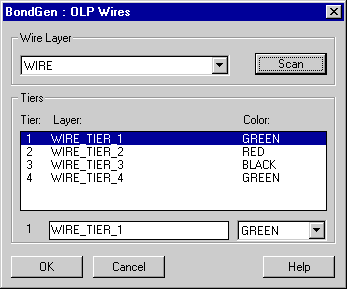
In 5 seconds (on our Pentium 333), the OLP Wires routine has analyzed the wires and segregated them into tiers. You can now set the layer name and color for each tier. Once done, press OK and the wires will be moved to the new layer and assigned the new color.

tier3.gif


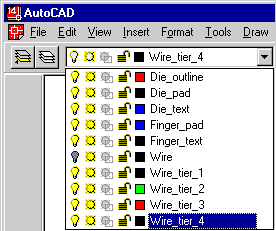
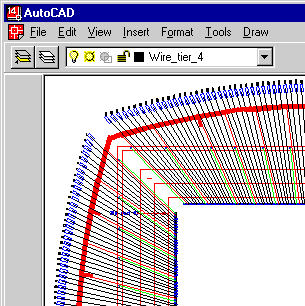
Here is what the new AutoCAD drawing looks like.You can pull down the layer selection box and see that there are now additional wire layers.

tier6.gif

tier5.gif


Bondgen Home Data Sheet PDF Pricing Download Revision History