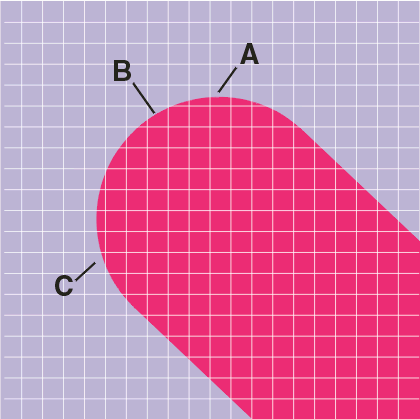

In order to assign gray levels to the pixels that lie on the "edges" of the traces and pads, the rasterization software has to over sample the input data.
That is, if your final output is to be 1000 dpi then software must sample at some higher level (2000, 4000, 8000, 16000) in order to extract information about the edge. The higher the oversampling, the more levels of gray can be generated.
Consider the pixel locations labeled A, B and C. What gray scale value should be assigned to each of these pixels and how should it be calculated?

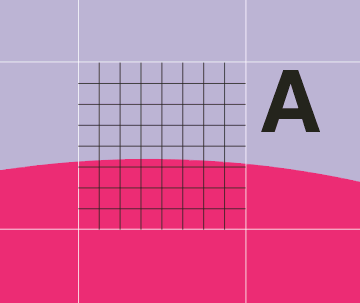
Pixel A supersampled 8X8 array
If the Gerber vector data is rasterized at 8X of the final resolution each final pixel is composed of 64 mini pixels.
The program counts how many of the "sub" pixels are inside the edge. In this example one could definitively say that 24 of the 64 pixels are completely inside. (The center point of the pixel is used to determine whether or not it is considered "on")
Pixel A would be assigned a value of 96 in the final gray scale (8 bit) output.

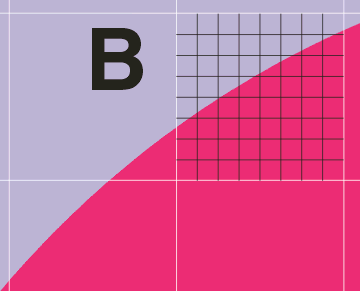
Detail of Pixel B
Pixel B -- 40 of the sub pixels have their center point inside of the trace.
Therefore pixel B would be assigned a gray scale value of 40/64 or in 8 bit range a value of 160.

Detail of Pixel C
For pixel C, only 3 of the mini pixels are "on"
Pixel C would be assigned a value of 12 in the 8 bit grayscale output.
When using super sampling to generate a greyscale output from our vector input, the number of grey levels are evenly distributed from white (255) to black (0).
We added this function for a client who had a power control system with only a few levels. Further, this control system was non-linear so the client wanted to make adjustments in the raster to compensate for the non linearity.