Installation Notes
Installation of Qckvu3 is controlled by the Install Shield installer. The primary issue is the nature of the licensing. Qkcvu3 supports two types of licensing:
Node Locked - in this mode, the program checks the machine it is executing on and reads either the machine's ethernet address (this comes from the ethernet adaptor) or the machine's disk volume serial number. It then compares this value with the value encrypted into the license strings. If they match, the program runs.
Floating Network License - in this mode, the program sends a short message to a license manager requesting permission to execute. The license manager gets the request, checks to see if there is an available license, and returns a "permission" to execute. The program must continue to renew the license every minute or so as long as it is running. Once the program terminates, it returns the license to the manager which makes it available to some other user. While this type of license is more complicated to install, it enables a team of designers to share a single license.
Node Locked Installation
Before you Start
You should already have on your machine prior to starting:
The qckvu3.win32.v312.exe install package. This is normally downloaded from Artwork's FTP server.
The installation password. This is required at the beginning of the install or you can proceed no further. We generally include it in the email to you when sending the license strings.
The license codes. These will have come via email and will look like:
     # QCKVU3 GDSII
     FEATURE ACS58IO artwork 1.0 23-mar-2009 uncounted HOSTID=0016e68e4a90 \
     SIGN="00B3 6A2D 7EF3 57A5 F216 D9DC 2E57 2A00 6BE5 ADE1 0E40 \
     F6A9 FB51 1042 D4CB"
Starting the Install/Selecting License Type
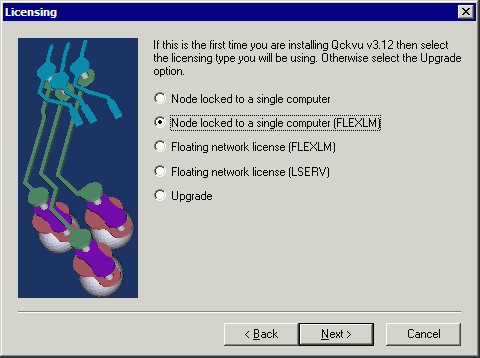
Double click on the install package. After some preliminaries you will be prompted to select a license type:

Because we are doing a node locked install we select: Node locked to a single computer (FLEXLM). Then Click on the Next button.
Entering the License Strings
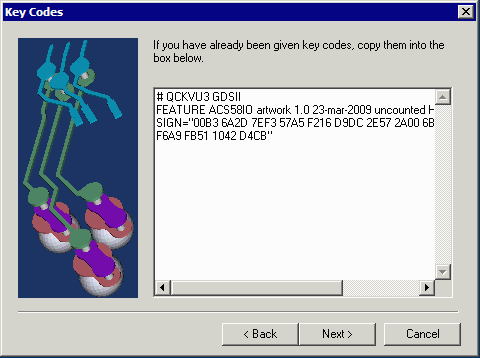
You should have received the license strings by email. Copy these to the Windows clipboard (Ctrl-C) and then paste them (Ctrl-V) into the window provided. Then click on the Next button.

Choose Installation Location
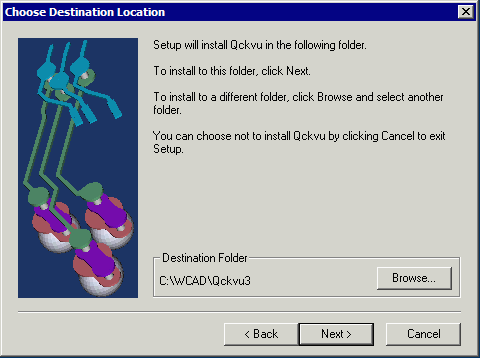
The next screen asks you where to install Qckvu3. The default directory is C:\WCAD\QCKVU3 but you are free to install it wherever you like.

Once the required files are copied and the registry updated your Qckvu installation is complete.
Files and Folders
For a node locked installation you can verify the following files and folders were created and contain the proper contents:
In the C:\WCAD\QCKVU3 directory (or wherever you installed) there are two license files. Use Notepad to open these files and verify that the contents are as expected:
acs.key
!#ACS FLXNODE FLXNODE FLXNODE FLXNODE FLXNODE FLXNODE FLXNODE
flexlm.lic
# QCKVU3 GDSII
FEATURE ACS58IO artwork 1.0 23-mar-2009 uncounted HOSTID=0016e68e4a90 \
SIGN="00B3 6A2D 7EF3 57A5 F216 D9DC 2E57 2A00 6BE5 ADE1 0E40 \
F6A9 FB51 1042 D4CB"
Of course, your actual license strings will be different based on your HOSTID.
